
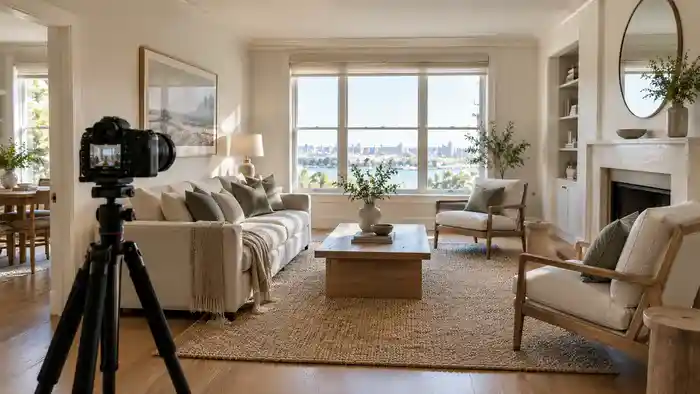
What Is Staging for Real Estate Photography?
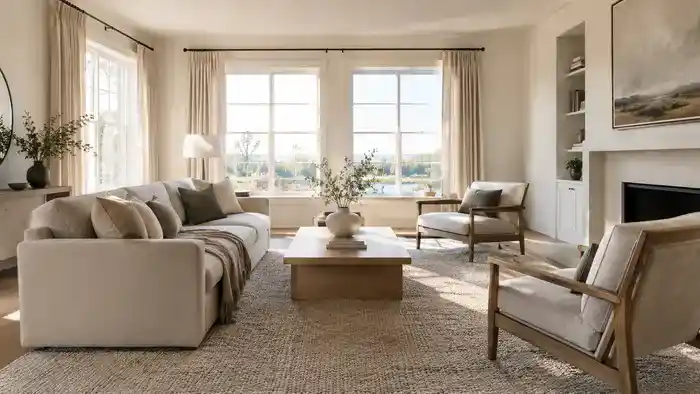
Staging for real estate photography is the process of arranging, editing and styling a property specifically for professional photographs and videos used to market it for sale or rent.
It involves more than cleaning and decluttering. Furniture placement, lighting, colour balance, textiles, accessories and camera angles all influence how a property appears on screen.
The goal is to create images that communicate space, functionality and atmosphere while representing the property honestly.
A well-prepared room does not need to be filled with decorative objects. It needs visual clarity, a convincing sense of proportion and a focal point that makes the space easy to understand.
1. Think in Frames, Not Just Rooms
When preparing a property for photography, begin by looking at each room through the camera’s eyes.
A room that feels balanced when you stand in the doorway may appear crowded from a wide-angle perspective. A beautiful armchair might block the view of a window. A carefully arranged collection of accessories may become visual clutter when compressed into a single frame.
Walk through the property and identify the strongest views before moving anything.
Ask yourself:
- What is the first thing the eye notices?
- Does the room’s main purpose read immediately?
- Can the viewer understand the layout?
- Is there anything distracting from the architecture, natural light or key features?
- Does the composition reveal something appealing about the property?
Take a few test photographs from different positions. The camera often reveals problems that are difficult to notice in person.
Kaotika tip: Do not decorate every corner equally. Give each photograph a clear visual idea. A bedroom might be about restful light, a living room about openness, and a terrace about the relationship between indoor and outdoor living.
2. Declutter Without Removing the Personality
Clutter is one of the most common problems in real estate photography. Too many objects compete for attention, surfaces appear smaller, and the viewer struggles to understand the space.
However, removing everything can make a property feel anonymous.
The answer is selective editing.
Clear kitchen worktops, bedside tables, desks and bathroom surfaces. Remove unnecessary cables, cleaning products, personal paperwork, excessive ornaments and objects that interrupt important sightlines.
Then keep a few carefully chosen details that help establish atmosphere: a textured cushion, a simple ceramic vase, a neatly folded throw or a small arrangement of fresh greenery.
These details should support the room rather than become the subject of the photograph.
Think of styling as editing a visual composition. Every object should earn its place.
3. Arrange Furniture to Reveal Space
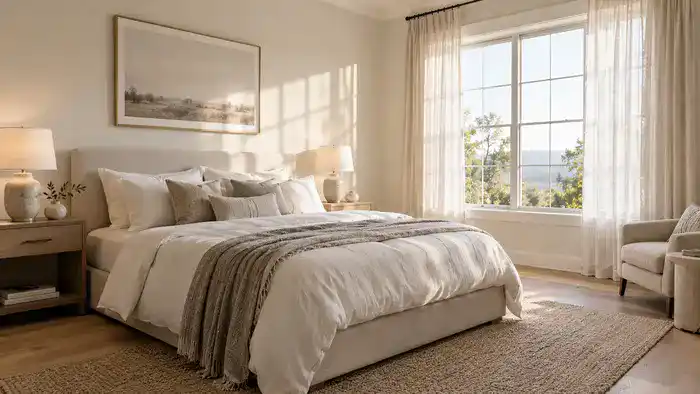
Furniture placement has a considerable influence on how large, functional and inviting a property appears in photographs.
A sofa pushed against a wall is not automatically the best solution. Nor is placing every piece of furniture symmetrically. The right arrangement depends on the room’s proportions, circulation and architectural features.
Before the photo shoot:
- Remove furniture that makes circulation awkward.
- Move oversized pieces away from important windows or architectural details.
- Make sure doors can open fully and entrances feel welcoming.
- Arrange seating to suggest a natural conversation area.
- Leave enough visible floor space to help communicate the room’s proportions.
- Check that furniture does not conceal built-in storage or other useful features.
In smaller properties, avoid trying to demonstrate every possible use of a room in a single frame. A clear, well-defined function is often more persuasive than a crowded arrangement designed to show everything at once.
The objective is not to make a room look empty. It is to make its potential easy to read.
4. Use Natural Light to Your Advantage
Light can transform the atmosphere of a property before a single accessory is moved.
Open curtains and blinds where appropriate, clean the windows and allow daylight to enter. Check how the light changes throughout the day, especially in rooms where orientation, views or large windows are important selling points.
Avoid automatically opening every blind to its maximum position. In some situations, direct sunlight creates harsh highlights, deep shadows or distracting reflections. A softer balance may reveal more detail and produce a more inviting image.
For interiors, a bright window is not always the only priority. The room itself needs to remain visually legible.
Artificial lighting requires equal care. Replace failed bulbs, check that visible fixtures work and consider whether different light sources create conflicting colour casts. A warm bedside lamp can add atmosphere, while an overly yellow ceiling light may make white walls look dull or discoloured.
The aim is not brightness at any cost. It is balanced light that reveals the space while preserving its character.
5. Style with Colour, Texture and Contrast
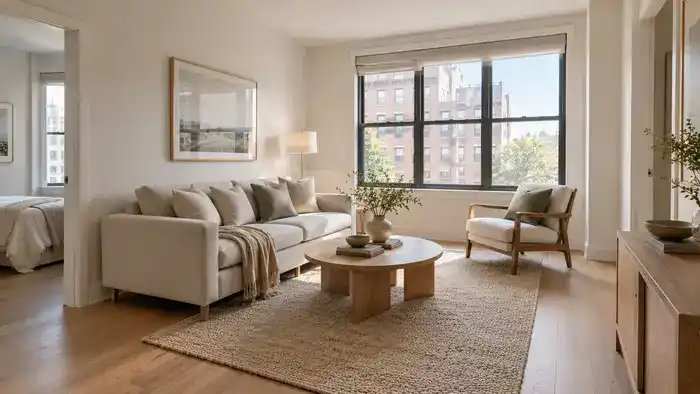
Photographs flatten certain aspects of a room. Texture, depth and subtle colour relationships can become less noticeable, particularly when the image is viewed on a small mobile screen.
This makes the choice of textiles and accessories important.
A neutral bedroom, for example, may benefit from layered bedding, a textured throw and cushions in complementary tones. In a living room, a rug can define the seating area, while curtains can soften the architecture and frame a view.
Contrast helps important elements stand out, but too many competing colours can make an image feel restless.
Consider the relationship between:
- Light and dark surfaces.
- Smooth finishes and tactile materials.
- Large furniture and smaller decorative details.
- Neutral backgrounds and restrained accents.
- Indoor furnishings and the landscape beyond the windows.
For tropical properties, natural fibres, breathable-looking textiles, timber and greenery can reinforce a connection with the surrounding environment. In mountain retreats, wool, wood and layered textures may communicate warmth and comfort. Coastal properties often benefit from an emphasis on daylight, visual openness and colours that complement the setting.
These are not rigid style formulas. The architecture, climate, location and intended audience should guide the decisions.
6. Prepare Every Room for Its Best Shot
A property is experienced as a sequence of spaces. Real estate photography should help the viewer understand that sequence.
Living rooms
Create a clear focal point, whether it is a view, fireplace, architectural feature or seating arrangement. Remove objects that obstruct circulation and check how furniture appears from the main shooting positions.
Bedrooms
Make the bed carefully, smooth visible creases and arrange pillows with restraint. Clear bedside surfaces and hide charging cables. Keep wardrobes and other storage areas tidy if they will be photographed.
Kitchens
Clear worktops as much as possible. Remove washing-up liquid, dishcloths, bins and small appliances that are not essential to the composition. Clean reflective surfaces and make sure taps and handles are free from marks.
Bathrooms
Remove toiletries, toothbrushes, cleaning products and laundry. Check mirrors, shower screens, taps and glass surfaces for watermarks. Fresh towels can introduce texture without making the room feel over-styled.
Entrance areas and hallways
First impressions begin before the viewer reaches the main living space. Clear shoes, bags and coats, check the lighting and make sure the entrance communicates a sense of order.
Terraces, balconies and gardens
Clean outdoor furniture, remove dead leaves and unnecessary objects, and arrange seating to demonstrate how the space can be used. A small table setting or a few well-positioned cushions may suggest relaxed outdoor living without turning the scene into a theatrical set.
Each room should look connected to the overall property while retaining its own purpose.
7. Do Not Forget the Details the Camera Notices
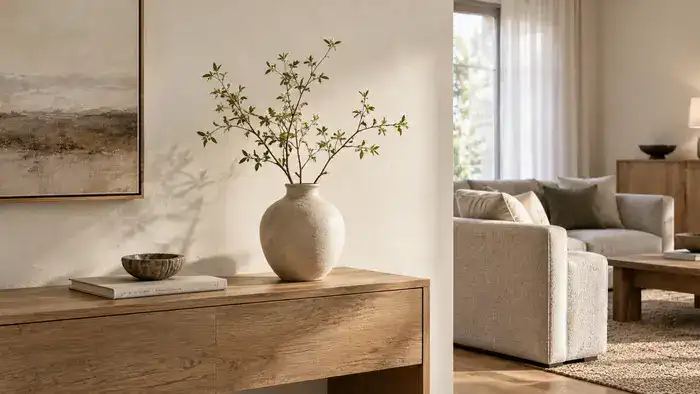
The camera has a particular talent for revealing small imperfections.
A slightly crooked picture, a twisted lampshade, uneven curtains or a visible cable may seem insignificant in person. In a carefully composed photograph, these details can become unexpectedly prominent.
Before the photographer arrives, carry out a final visual inspection.
Check:
- Straight picture frames, lampshades and decorative objects.
- Curtains and blinds that hang evenly.
- Clean mirrors, glass and reflective surfaces.
- Fingerprints on stainless steel and glossy furniture.
- Visible cables, switches and unnecessary equipment.
- Bed linen, cushion covers and towels.
- Reflections in mirrors, windows and television screens.
- Small objects that appear unintentionally cut off at the edge of a frame.
Take photographs of each room with a phone and review them on screen. This quick exercise can reveal distracting details before the professional shoot begins.
8. Make Small Spaces Feel Clear, Not Artificially Large
Wide-angle photography is frequently used to show interior spaces, but it can distort proportions when handled poorly. Staging should support a clear view of the room rather than attempt to disguise its actual dimensions.
In compact apartments, prioritise unobstructed sightlines, appropriately scaled furniture and simple compositions. Avoid pushing every object to the perimeter simply to create an empty centre; the result can feel unnatural.
Mirrors can help distribute light and introduce depth, provided their reflections are considered carefully. Light colours may contribute to an open atmosphere, but they are not a substitute for sensible furniture placement.
A small room can be appealing because it feels efficient, comfortable and thoughtfully designed. Its photographs should communicate those qualities rather than suggest that it is something else.
9. Prepare Outdoor Spaces as Carefully as Interiors
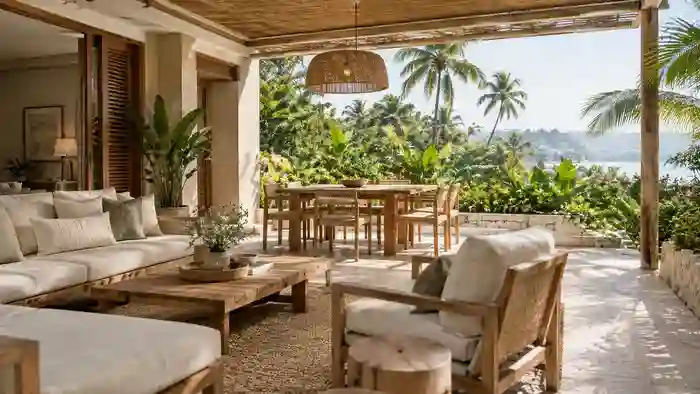
For hotels, holiday rentals and homes in attractive locations, outdoor areas can be among the property’s strongest visual assets.
A terrace with a view, a shaded dining area, a balcony with morning light or a garden beside a swimming pool can communicate an entire lifestyle in one image.
Clean outdoor surfaces, arrange furniture with the view in mind and remove hoses, cleaning equipment, garden tools and unnecessary plastic objects. Check cushions for fading or moisture marks, and make sure parasols and awnings are positioned neatly.
Consider the climate when styling outdoor areas. In hot or tropical destinations, shade, ventilation and the relationship between indoor and outdoor spaces may be more compelling than an arrangement that looks attractive but offers little practical comfort.
Photograph outdoor spaces in suitable light. Depending on the orientation and weather, early morning or late afternoon may provide a more balanced result than the strongest midday sun.
10. Create a Consistent Story Across the Property
A successful real estate photo gallery is more than a collection of attractive individual images. It tells a coherent story.
The entrance introduces the property. The living areas establish how it functions. Bedrooms and bathrooms communicate comfort and practicality. Outdoor spaces reveal additional possibilities.
Keep the styling consistent throughout. Colours, materials and decorative details should feel related without making every room look identical.
For hospitality properties, this consistency can also help communicate the guest experience. A hotel bedroom, lounge and terrace should feel as though they belong to the same place, not three unrelated design schemes.
For homes being marketed for sale, a coherent visual story helps prospective buyers understand the layout, character and potential of the property.
The photographs should encourage exploration, not leave the viewer wondering how one space relates to another.
11. Coordinate with the Real Estate Photographer
Home staging and real estate photography work best when they are treated as connected parts of the same process.
If possible, speak to the photographer before the shoot. Discuss the property’s strongest features, the intended audience, the number and type of images required, and any particular views that should be prioritised.
Ask whether the photographer plans to capture wide interior views, architectural details, lifestyle-oriented compositions, outdoor areas or video walkthroughs. Each format may require slightly different preparation.
For example, a decorative arrangement that looks effective in a close-up may appear cluttered in a wide shot. A room prepared for still photography may also need additional attention if it will be filmed, because video reveals more of the space and often includes changes in perspective.
Allow time for small adjustments during the shoot. Moving a chair, turning a lamp or removing one accessory can significantly improve a composition.
The best results usually come from collaboration rather than treating staging and photography as separate tasks.
12. Keep the Images Attractive but Honest
The purpose of real estate photography is to present a property at its best while helping viewers form realistic expectations.
Styling can improve presentation, clarify how rooms function and draw attention to genuine strengths. It should not conceal significant defects, misrepresent room dimensions or suggest facilities that do not exist.
Avoid excessive wide-angle distortion, misleading edits or digitally added furnishings that could confuse prospective buyers or guests. Where virtual staging is used, follow the applicable platform requirements and local rules on disclosure.
Trust matters. Attractive images may generate interest, but a property that matches the expectations created by its photographs is more likely to deliver a positive viewing or guest experience.
The most effective visual storytelling does not invent a better property. It reveals the appeal of the one that is actually there.
The Final Camera-Ready Checklist
Before the photo shoot, walk through the property once more with a camera or phone in hand.
- Windows, mirrors and reflective surfaces are clean.
- Worktops and visible surfaces are free from unnecessary objects.
- Furniture allows clear circulation and reveals the room’s purpose.
- Beds, cushions, curtains and towels are neatly arranged.
- Bulbs and visible light fixtures are working.
- Personal items, rubbish, cleaning products and cables are out of sight.
- Outdoor areas are clean, tidy and ready to use.
- Important views and architectural features remain unobstructed.
- Decorative details look intentional in test photographs.
- The styling feels consistent throughout the property.
- Every image will represent the property honestly.
Frequently Asked Questions About Staging for Real Estate Photography
What is the difference between home staging and staging for real estate photography?
Home staging prepares a property to appeal to prospective buyers or tenants, whether they view it online or in person. Staging for real estate photography applies those principles specifically to the camera, with particular attention to composition, lighting, furniture placement, visual distractions and how rooms appear in photographs.
How do you prepare a house for real estate photography?
Start by cleaning and decluttering every room. Arrange furniture to improve circulation and reveal the layout, maximise balanced natural light, style beds and soft furnishings, remove distracting personal items, and inspect each space through test photographs. Pay particular attention to windows, reflective surfaces, cables and small details that may become prominent on camera.
Should you remove all personal items before photographing a property?
Not necessarily. Remove highly personal, distracting or sensitive items, including family photographs, paperwork and valuables. A small number of neutral decorative details can help create warmth and atmosphere. The objective is to make the property appealing and easy to imagine living in without making it feel either cluttered or completely lifeless.
What is the best lighting for real estate photography?
Balanced natural light is often an excellent starting point. Clean windows, open curtains where appropriate and avoid unnecessarily harsh sunlight or deep shadows. Interior lighting should complement daylight without introducing distracting colour casts. The best conditions depend on window orientation, weather, room function and the photographer’s approach.
How should you stage a small apartment for photography?
Use appropriately scaled furniture, keep important sightlines clear, reduce unnecessary accessories and define each room’s main function. Let light travel through the space where possible, and use mirrors thoughtfully. Avoid misleading angles or excessive wide-angle distortion; good photographs should show the apartment’s real proportions while highlighting its functionality and character.
Is home staging worth it before selling or renting a property?
Staging can improve the visual presentation of a property and help prospective buyers or guests understand its layout, functionality and atmosphere. Its value depends on the property’s condition, market, target audience, staging costs and marketing strategy. It cannot guarantee a faster sale or higher rental income, but it can help create a clearer and more compelling first impression.
Do holiday rentals and hotels need staging for photography?
Yes, thoughtful styling can help hotels, resorts and holiday rentals communicate their atmosphere, amenities and intended guest experience. Bedrooms, bathrooms, dining areas, terraces and shared spaces should look inviting, functional and consistent with the property’s actual offering. Images should accurately represent the accommodation and avoid creating expectations that the guest experience cannot meet.
Can you stage a property yourself before the photographer arrives?
Yes. Owners and agents can make substantial improvements through cleaning, decluttering, simple furniture adjustments, careful bed styling and basic lighting checks. For properties with significant marketing potential, complicated layouts or a distinctive design identity, a professional home stager or interior stylist can provide additional expertise in composition and visual presentation.
A Property Is More Than a Photograph
A photograph freezes a moment, but a successful property image suggests what that moment might feel like.
Morning light across a bedroom. A table ready for a quiet breakfast. A terrace that invites someone to stay a little longer. These are small visual cues, but they help transform a list of rooms and features into a place someone can imagine inhabiting.
Staging for the camera is ultimately about making thoughtful decisions: what to show, what to remove, where to direct the eye and how to communicate the character of a space.
At Kaotika, we believe the strongest images do more than make a property look attractive. They reveal its identity, its atmosphere and its possibilities.